
This worksheet is designed to be completed in 10 minutes. Open and check the items in the table below one by one, starting from the top, and mark completed items in the completion box. The menu path follows the name of Apple and Google official help as of September 2026. Android is based on Google Pixel, and the name and location may be different on devices that use the manufacturer's screen, such as Samsung Galaxy. If you're having trouble finding the menu, enter key words like "permissions," "location," "tracking," or "lock" into the search box at the top of the Settings app. Rather than changing them all at once, it is better to change them one by one and check to see if there are any inconveniences.
Settings that are most effective in protecting smartphone privacy are screen lock, operating system update, app permission management, and two-step account authentication. Add to this location, ad tracking, lock screen notifications, device finding, automatic Wi-Fi connection, and backup and installation paths, and you've got yourself covered for most of the everyday risks. The priorities are the same as the order in the table. Locks and updates come first, followed by permissions and location, tracking and notifications, finding accounts and devices, and connection and installation habits.
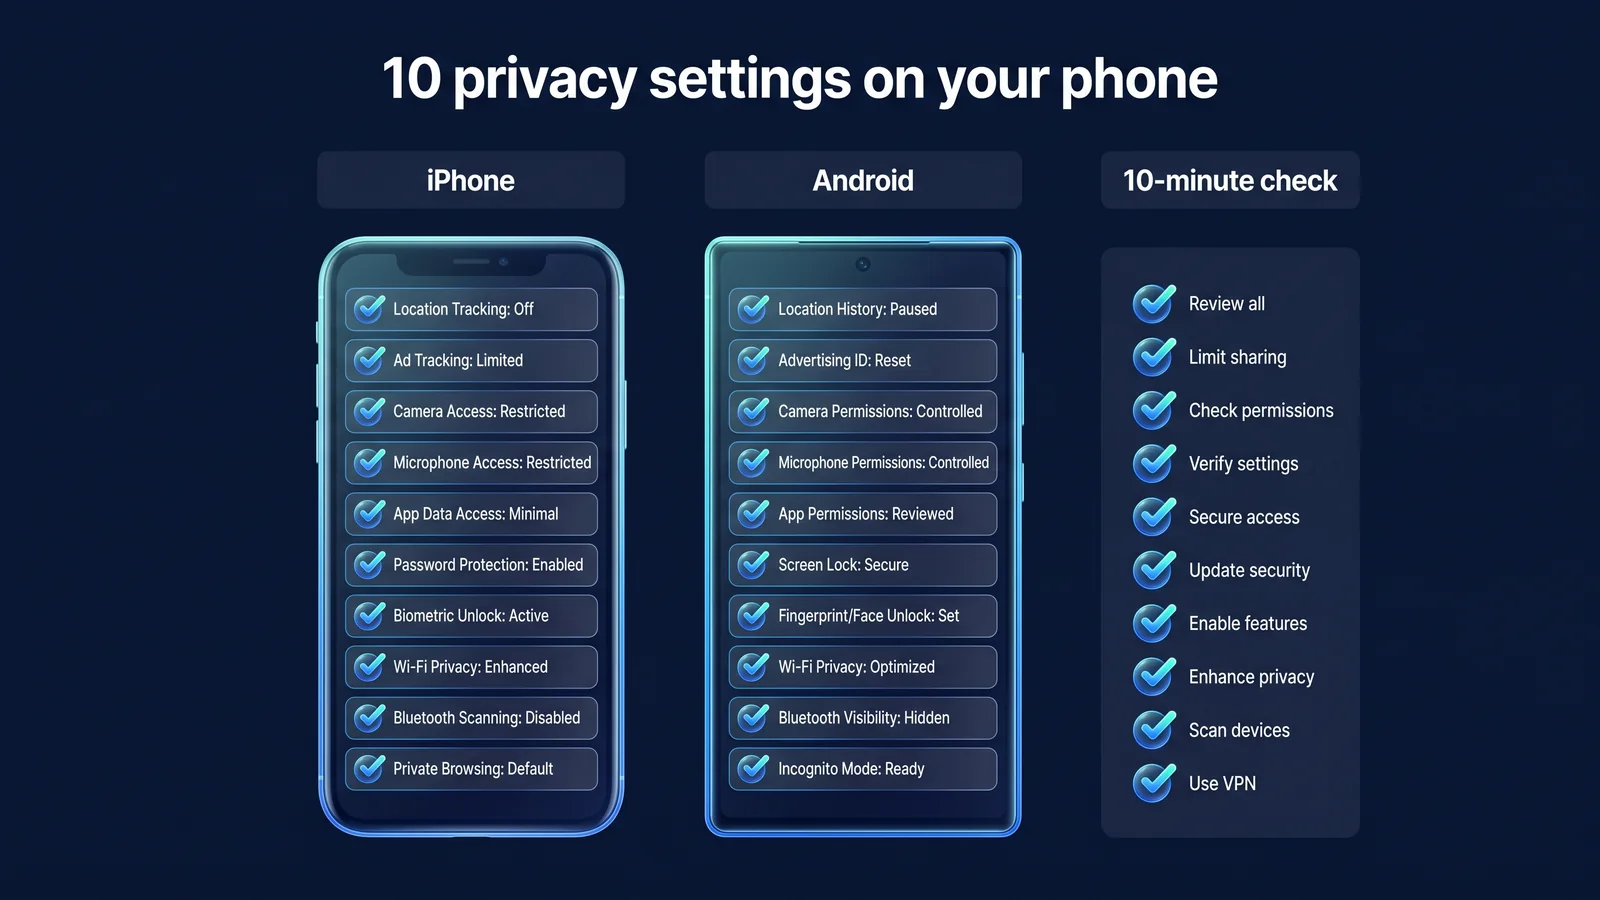
10-Minute Checklist Worksheet: Where and what do you check?
The table below is the main body of this article. The '>' in the path means entering the next menu. The reasons and recommended values for each item can be found in the description of each bundle below the table. Items whose paths were not confirmed were written down as settings search terms.
| item | iPhone path | Android path (based on Pixel) | complete |
|---|---|---|---|
| 1. Screen lock/biometric authentication | Settings > Face ID & Passcode (or Touch ID & Passcode) | Settings > Security & Privacy > Screen Lock | □ |
| 2. Automatic update | Settings > General > Software Update > Automatic Updates | Settings > System > Software Update | □ |
| 3. Organize app permissions | Settings > Privacy & Security | Settings > Security & Privacy > Privacy > Permission Manager | □ |
| 4. Turn off precise location | Settings > Privacy & Security > Location Services > Select an app > Precise location | Settings > Location > App location access permissions > Select an app > Use precise location | □ |
| 5. Limit ad tracking | Settings > Privacy & Security > Tracking | Settings Search “Advertising” > Delete Advertising ID | □ |
| 6. Preview lock screen notifications | Settings > Notifications > Show previews | Settings > Notifications > Lock screen items > Turn off sensitive notifications | □ |
| 7. Account 2-step verification | Settings > [user name] > Login & security > Two-factor authentication | Google Account > Security > 2-Step Verification | □ |
| 8. Find your device | Settings > [your name] > Find My > Find My iPhone | Automatically turns on when adding a Google account. Confirm with Settings Search “Find My Device” | □ |
| 9. Wi-Fi automatic connection/private address | Settings > Wi-Fi > Info button next to Network > Auto connect/private Wi-Fi address | Saved networks > Select network > Auto connect/Privacy protection | □ |
| 10. Backup/official path installation | Settings > [your name] > iCloud > iCloud Backup | Play Store > Profile > Play Protect. For backup, search for “Backup” in Settings | □ |
If you print the table or capture the screen, you can check it in the same order next month. For descriptions of each item, click on the title in the bundle below to expand. On devices that use manufacturer screens, such as Samsung Galaxy, the locations of sub-items may be different even if the menu names are similar. If the Android path in the table does not match, use the settings search box. Even on iPhone, menu names change slightly depending on the iOS version, so if the names are different, look for items with similar names.
1~2. Screen Lock and Updates: Why First?
The reason screen lock and updates come first is because they are the prerequisite for all other settings. Without a lock, anyone who gets hold of the device can easily change permissions and account settings, and when updates are pushed out, known vulnerabilities remain.
1. Screen lock and biometric authentication — Turn on 6-digit or more password and biometric authentication together
Use a numeric or alphanumeric password with at least 4 or more characters, turn on biometric authentication such as Face ID or fingerprint, and set the auto-lock time to a short time. iPhone has stolen device protection. You can turn it on in iOS 17.3 or later by going to Settings > Face ID & Passcode > Stolen Device Protection. It requires biometric authentication when performing sensitive tasks such as changing account passwords while away from familiar locations such as home or work, and imposes security delays on some tasks. Android has different anti-theft lock functions depending on the device and version, so check in the security settings. You can also lock your SIM card. Turning on SIM PIN prevents someone from removing your SIM and receiving a verification text message with your number if you lose your device. For iPhone, turn it on in Settings > Cellular > SIM PIN, and for Android, turn it on in the SIM card lock item in Security settings. If you do not know the default PIN set by your carrier, check with your carrier first. Be careful because if you enter an incorrect PIN multiple times, your SIM will be locked.
2. Automatic updates — leave both operating system and apps automatic
Updates often include fixes for known security vulnerabilities. Turn on automatic operating system updates and automatic store app updates. If your device has no longer supported security updates from the manufacturer, consider when to replace it. It is safer to delete apps that are not being used, as they tend to remain updated.
It's easy to understand smartphone security when you think of it as five layers: account, device lock, software, app permissions, and network connection. The higher the floor, the greater the damage when breached. If your account is hijacked, all your photos, emails, and backups will be exposed even if you change devices. Risks on public Wi-Fi areas can be significantly reduced with VPN and HTTPS.
- accountTwo-Step Verification, Recovery Method (Item 7)
- device lockPasswords, biometric authentication, and device locator (items 1·8)
- softwareUpdate, install official path (items 2·10)
- app permissionsPermissions, Location, Tracking, Notifications (Items 3-6)
- networkWi-Fi settings, VPN, HTTPS (Item 9)
3~4. App permissions and location: What do you organize by?
The standard for organizing app permissions is to allow only the permissions required for the function and only when needed. The types of information and risks exposed are different for each authority. Location represents home and work, microphone represents conversations, contact information represents acquaintances, and photos represent shooting locations.
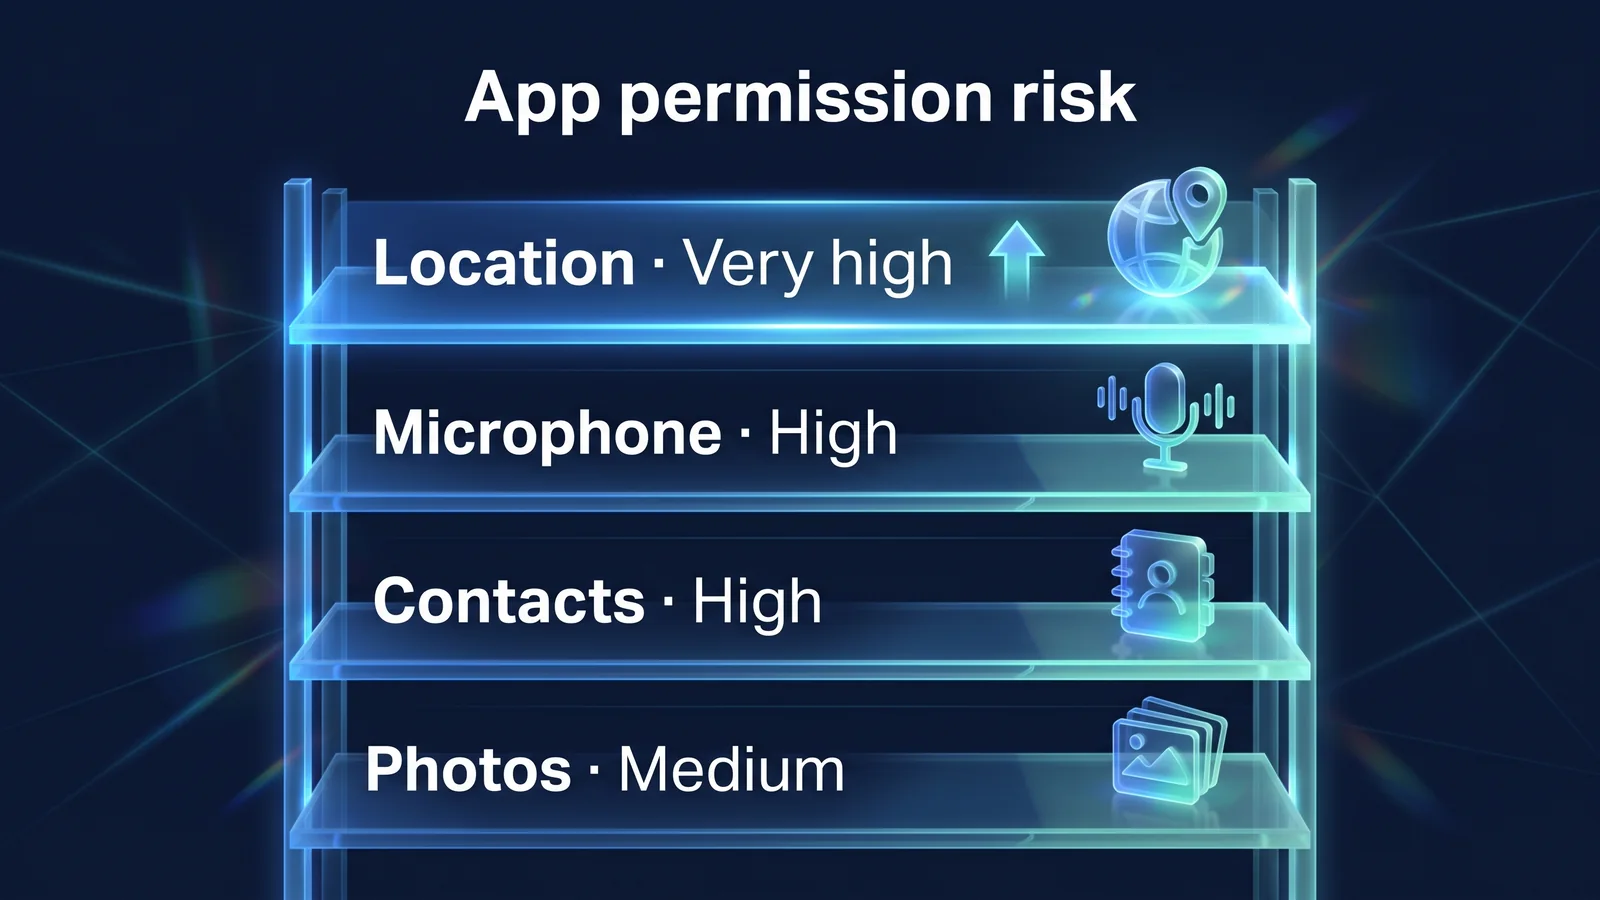
3. Organize app permissions — See which apps have access by permission
On your iPhone, you can see which apps have access by permission in Settings > Privacy & Security. On Android, you can check the same information in Permission Manager, or change it for each app in Settings > Apps > Select app > Permissions. Actively use “Allow only while using the app” and “Ask every time.” It is best to allow only essential apps such as video calls and camera apps for the camera and microphone, only essential apps such as messenger apps for contacts, and only selected photos for photos. Android denies text-reading permissions to all but the default text app. Accessibility permissions are the permissions most often abused by malicious apps, as they allow them to read screen content and click on their behalf, so only give them to trusted assistive apps. Android has a setting that automatically revokes permissions from apps you haven't used in months. You can turn on the option to delete permissions when not using the app in the permissions section of app information, and depending on the device, it is turned on by default. Your iPhone doesn't automatically revoke permissions, so check it yourself during your monthly checkup.
4. Turn off precise location — Turn it off for apps that only need to know the approximate location
Apps that only need to know the approximate area, such as weather, shopping, or news apps, don't need your exact location. On iPhone, if you select an app in Location Services and turn off precise location, on Android, if you turn off use precise location in app location access permissions, only approximate location will be transmitted. Turn on precise location for maps, navigation, and delivery apps, but limit them to “while using the app.” Turning off precise location can result in inaccurate directions or delivery address verification, so it's practical to leave it on for these apps.
| Choice | What the app can know | Recommended for |
|---|---|---|
| Always + exact location | Current location and travel route in meters even when the app is closed | Only when absolutely necessary, such as device finding or family location sharing. |
| While using the app + exact location | Accurate location only while you are using the app | Maps, navigation, delivery, taxi |
| While using the app + approximate location | Neighborhood location while using the app | Weather, news, shopping, SNS |
| just ask once | Location for this run only | Apps I occasionally use |
| No | location unknown | Apps without location functionality |
The shooting location recorded in the photo is also location information. If you set the photo permissions to 'selected photos only', you can reduce the app from reading location information in photos all at once. If you turn off the permission, only the functions that require that permission will be unusable, and most other functions will continue to operate as is. When you try to use the function, the app will ask for permission again, so you can grant it then.
5~6. Ad Tracking and Lock Screen Notifications: What's Leaking?
Ad tracking is a route through which activity between apps is leaked, and lock screen notifications are a route through which authentication numbers and message content are leaked. Once you set both, they will remain in effect.
5. Limit Ad Tracking — Block tracking requests or delete advertising IDs
Ad tracking refers to collecting activity from multiple apps and websites, combining them into a single identifier and using it for advertising purposes. On iPhone, you can prevent apps from requesting tracking or turn it off on a per-app basis in Settings > Privacy & Security > Tracking. Android can delete advertising IDs, and deleting them prevents new IDs from being created. The ads themselves aren't going away. You may still see ads based on information you provide to the app instead of your Advertising ID. This can be understood as a setting that reduces the binding of cross-app activities to a single identifier. Your browser has similar settings. Safari on iPhone lets you turn on Cross-Site Tracking Prevention in Settings > Safari, and Chrome lets you restrict third-party cookies in the Privacy section of Settings. Your app's advertising ID and your browser's cookies are separate identifiers, so organizing both will reduce tracking.
6. Preview lock screen notifications — make them visible only when unlocked
If the authentication number or message content is displayed on the lock screen, people next to you or anyone who picks up the device can also see it. iPhone changes Settings > Notifications > Show Previews to ‘When Unlocked’. Android turns off sensitive notifications in the Lock Screen section of Notification Settings. You can also select only financial and messenger apps and set them for each app. This setting is especially important if many services use authentication numbers received by text message.
| Display method | What you see on the lock screen | recommended |
|---|---|---|
| Always preview | Sender and full content | Not recommended |
| Only when unlocked | Just the name of the app and the fact that the notification came. | Basic recommended |
| App-specific settings | Hide finance/messenger and show the rest | People who frequently check notifications |
| No | No notifications on lock screen | Sensitive business devices |
7~8. 2-Step Verification of Accounts and Device Locator: How do I prepare for loss?
The two pillars of protection against loss are account and device. 2-Step Verification protects your account even if you lose your password, and Find Device protects your data even if you lose your device.
7. Account 2-step authentication — Turn on Apple and Google accounts first.
Ultimately, the center of smartphone security is your account. Two-step authentication refers to a login method that requires a code or approval received from your device in addition to your password. For Apple accounts, turn on two-factor authentication in Settings > [your name] > Sign-in & security, and for Google accounts, turn on two-step authentication in the Security menu. Keep your recovery phone number and email up to date, and keep a recovery tool in case you lose your device, like Google backup codes. If you lose your phone with two-step verification turned on, you can still sign in as long as you have a trusted phone number, backup code, or another logged in device. Google account security diagnosticsYou can check it at once.
| means of recovery | When to use it | Things to note |
|---|---|---|
| Trusted phone number | When you receive a code via text or phone call | You may not be able to receive text messages from domestic numbers overseas. Renew immediately when you change your number |
| authentication app | When you need a disposable code without a network | Migrate to a new device before changing devices |
| backup code | When you can't use both your phone and the authentication app | Print or set aside in a safe place. Code once written cannot be reused |
| Other logged in devices | When approving from a tablet or PC | Log out of your account on devices you are not using |
| recovery email | When resetting your password | Two-step verification also applies to recovery email accounts |
8. Find your device — Get ready to locate, lock, and remotely wipe your device
If you turn on Find My on iPhone and Find My Device on Android, you can locate, lock, and remotely wipe your device if it is lost. Android automatically turns on Find My Device when you add a Google Account to your device. Immediately after loss, the device checks its location on another device or on the web and makes a sound. If you're having trouble finding them, lock your device and display your contacts on the lock screen. Within the same day, we process loss reports to telecommunications carriers, major account password changes, and suspension of financial app use. If recovery is difficult, erase the data with remote wipe. Reset is irreversible, so leave it as the last step.
- Check your locationCheck location and make sounds on other devices or on the web
- lockLock in lost mode and show contacts
- Account/Financial MeasuresReport to telecommunication company, change password, suspend financial app
- remote wipeLast step when recovery is difficult
9~10. Wi-Fi connection and installation habits: How much responsibility does a VPN have?
Wi-Fi connection and installation habits are an area that both device settings and VPN take care of. Device settings determine which network to connect to and which apps to install, and VPN encrypts communications on the network section to which it is connected.
9. Wi-Fi automatic connection/private address — Delete unused networks and turn off automatic connection
To avoid automatically connecting to fake Wi-Fi with the same name, delete networks you don't use often and turn off automatic connection. iPhone can use a private Wi-Fi address for each network, and after iOS 18, you can choose between Off, Fixed, and Rotating. Android can decide whether to use random hardware addresses in saved network privacy entries. It is best to turn off Bluetooth when not in use. Encrypt communications with a VPN on untrusted networks such as cafes or airports. The detailed rules are 9 rules for public Wi-FiIt is in
10. Backup/Official Path Installation — Turn on backup and prevent installation outside the store
If you turn on iCloud Backup or Google Backup, you can get your data back if you lose your device. The account where your backups are stored must be protected with two-step verification. Install apps only from official stores such as the App Store and Google Play, and do not open installation files from links received via text or messenger. Google Play Protect on Android is turned on by default and scans installed apps for risky behavior before installation. Also check if there are any apps you have permission to install by entering “apps from unknown sources” in the settings search box. This permission is not granted to browsers and messengers. If a link sent via text or messenger asks you to install an app, it may be smishing. Text messages purporting to be for delivery, fines, or congratulations or condolences are common. Don't click the link, but check directly on the official app or official website. For suspicious text messages, you can contact the Korea Internet & Security Agency (KISA) 118 Counseling Center.
A VPN is not a replacement for setting up your smartphone. A VPN is a tool that encrypts communication between your device and a VPN server and changes the IP that sites see. It's up to your device settings to decide which apps read your location, what you see on the lock screen, and how your account is safe. Conversely, it is difficult to protect communications in public Wi-Fi sections with device settings alone.
What device settings protect
- Preparing for lockout and loss
- App permissions and location
- Advertising identifiers and tracking requests
- lock screen notifications
What a VPN Protects
- Encryption of communications in public Wi-Fi sections
- DNS lookups visible to network operators
- My IP as seen on the site
What can't replace both
- Phishing links and fake login pages
- Use the same password across multiple services
- Information given after being deceived by a fraudulent call or text message
The StageVPN app (iPhone/Android) sends device-wide IPv4/IPv6 traffic and DNS lookups to the WireGuard tunnel. Even if you turn on your VPN, you will still be tracked by logged in accounts, advertising identifiers, and location permissions you grant to apps, so you'll need to organize items 3 through 5 together. The role and limitations of VPN What VPNs Prevent and Can't Preventclass DNS leak and WebRTC leakIn, the basic instructions are Privacy Noticeand Security habits guideYou can see it here.
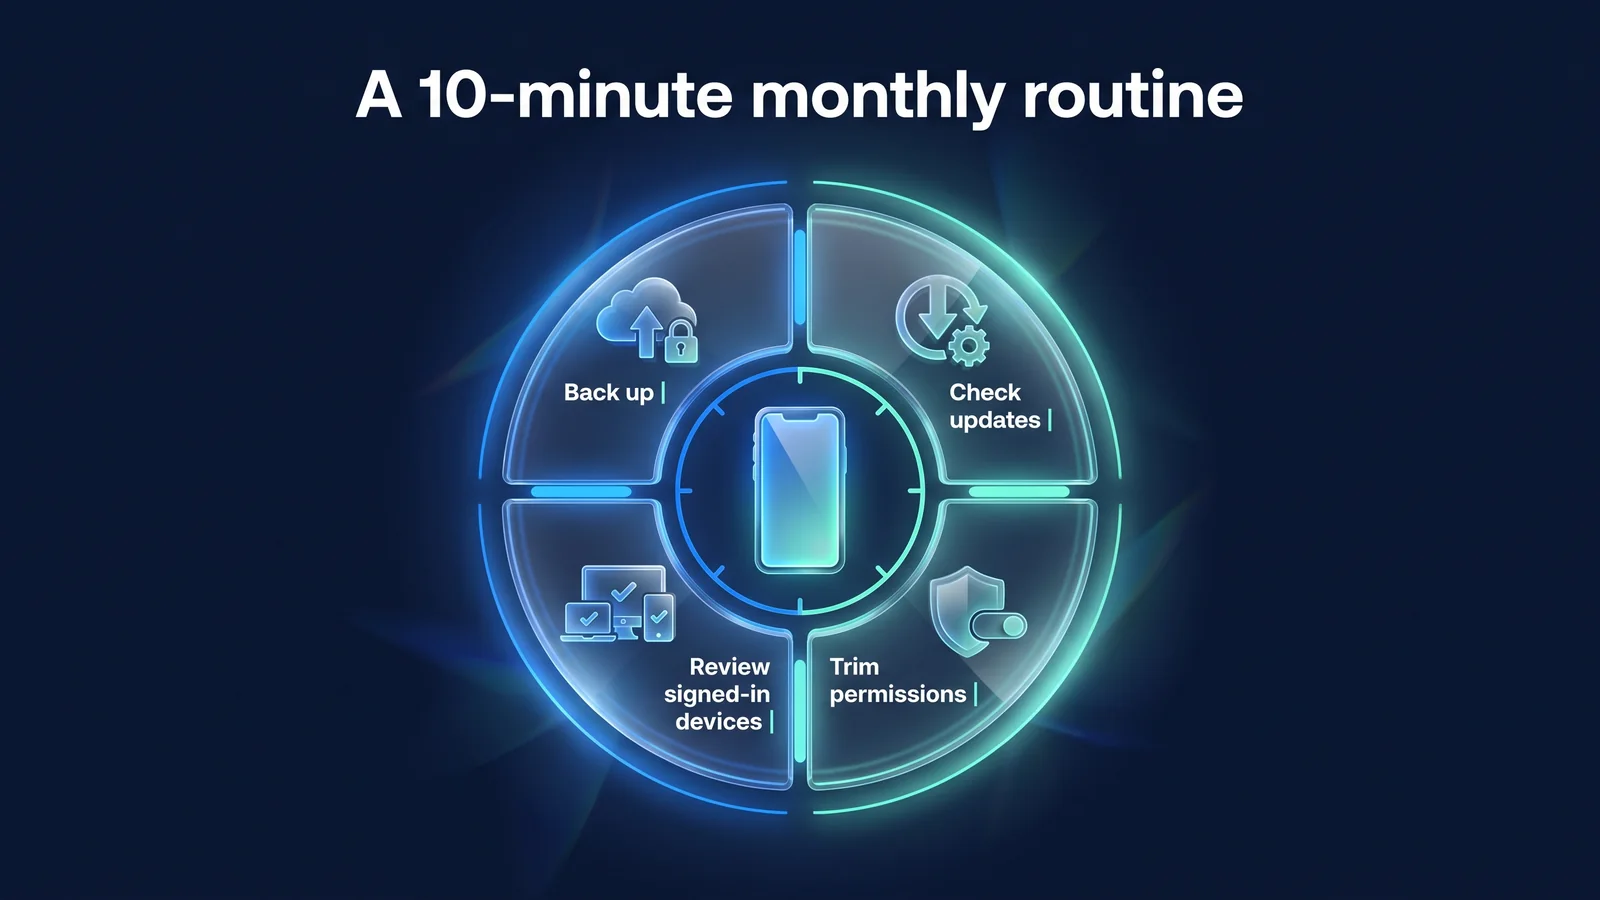
What is your once-a-month, 10-minute inspection routine?
You don't have to change the settings once and that's it. As I install new apps and go through updates, things get a little messy. It is enough to check the four things in the picture above plus deleting unused apps for 10 minutes once a month in the order below. On your iPhone, you can also review the apps and information you're sharing with others at a glance in Settings > Privacy & Security > Safety Checkup.
- 0~2 minutesCheck for updates
Make sure you don't have any overdue operating system and app updates, and install any over your home Wi-Fi (item 2).
- 2-5 minutesPermissions Cleanup
View the list of apps with location, camera, and microphone permissions, and remove permissions for apps that you haven't used in the past month. Also view precise location and allow tracking apps (items 3-5).
- 5-7 minutesCheck your login device
Check the list of devices logged in to your Apple/Google account and security notifications. If you have any devices you don't know, log them out and change their passwords (Item 7).
- 7-9 minutesCheck backup
Check the last backup time. If backups are stuck, check your storage or Wi-Fi settings (Item 10).
- 9-10 minutesDelete unused apps
Delete apps you haven't opened in a month. Fewer apps mean less permissions and update management.
| point of view | Check items | Related topics |
|---|---|---|
| When installing a new app | Verify that the permission request matches the functionality | 3, 4, 5 |
| every month | 10 minute inspection routine | 2, 3, 4, 5, 7, 10 |
| every quarter | Recovery phone number/backup code, check stolen device protection status | 1, 7 |
| Before traveling or business trip | Find your devices, back them up, and organize your saved Wi-Fi | 8, 9, 10 |
| When changing or selling a device | Log out and reset account after backup | 7, 8, 10 |
When replacing or selling devices, order is important. First, make sure the backup is complete, log out of your account, turn off device discovery, and finally do a factory reset. If you reset with Device Finder turned on, the next user may not be able to activate your device. Remove the SIM card and external memory as well. On your new device, go through this worksheet again from the beginning.
Preparation before travel Overseas travel VPN usage guideand 7 reasons why you need a VPN when abroadCheck it out together here. Installing the StageVPN app and connecting for the first time is iPhone/iPad Informationand Android instructionsIt is in
reference material
- About iPhone's Stolen Device Protection feature — iOS 17.3 and above, setup path and security delay (Apple Support)
- When an app requests to track your activity — Settings > Privacy & Security > Tracking (Apple Support)
- Two-factor authentication for your Apple account — How to turn on two-factor authentication (Apple Support)
- How to turn on Find My on your iPhone, iPad, or Mac — Find My iPhone settings path (Apple Support)
- Use private Wi-Fi addresses on Apple devices — Private Wi-Fi addresses and off, fixed, and rotating options (Apple supported)
- Change app permissions on your Android phone — App-specific permissions and permission manager path (Android Help Center)
- Manage your app's access to location information — Turn on precise location (Android Help Center)
- Use 2-Step Verification — Set up Google Account 2-step verification (Google Account Help Center)
- Keep your apps safe with Google Play Protect — Play Protect’s inspection scope and confirmation method (Google Play Help Center)
- Personal Information Protection Committee — Personal information protection policy and user information (Personal Information Protection Committee)
- KISA Protection Country — Information on reporting infringement incidents such as smishing and 118 consultation (Korea Internet & Security Agency)